Here’s how to set up your profile icon and profile cover image. / プロフィール画像、カバーを設定する方法
How to change your profile image.
Step 1
Access your profile page and under your current profile image, click the pencil icon labeled “Edit profile icon.”
Step 2
![]()
Once the screen changes to the image above, click the cloud icon. Select a photo you want as a profile image.
Step 3
After your selected photo displays, resize or drag the box to crop your photo. After you’re done, click “update” and it will set that photo as your profile image.
![]()
=========================
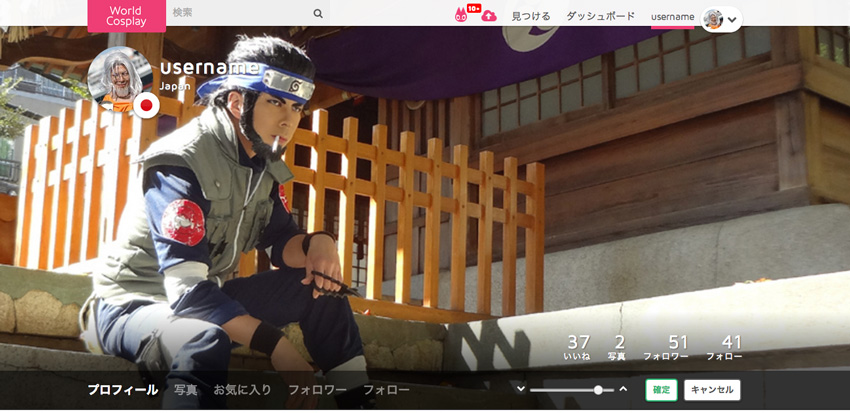
How to change your profile cover image.
Step 1
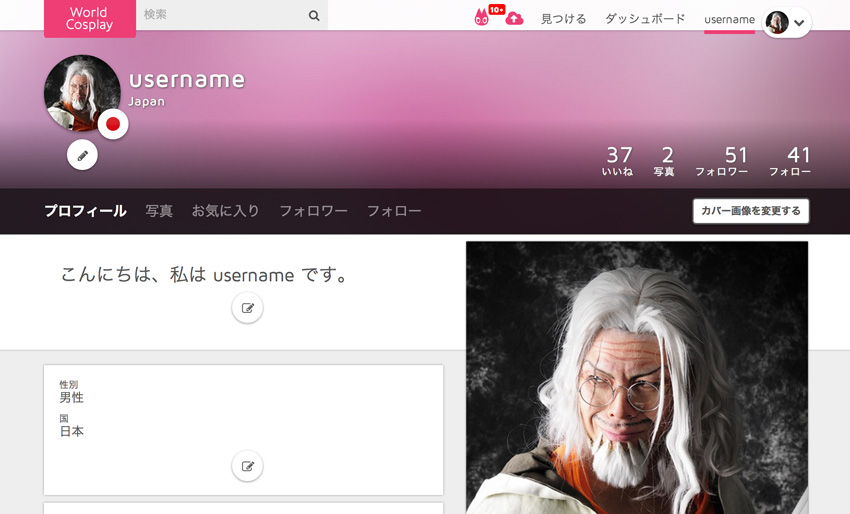
Access your profile page and click the “Edit profile cover” button.
Step 2
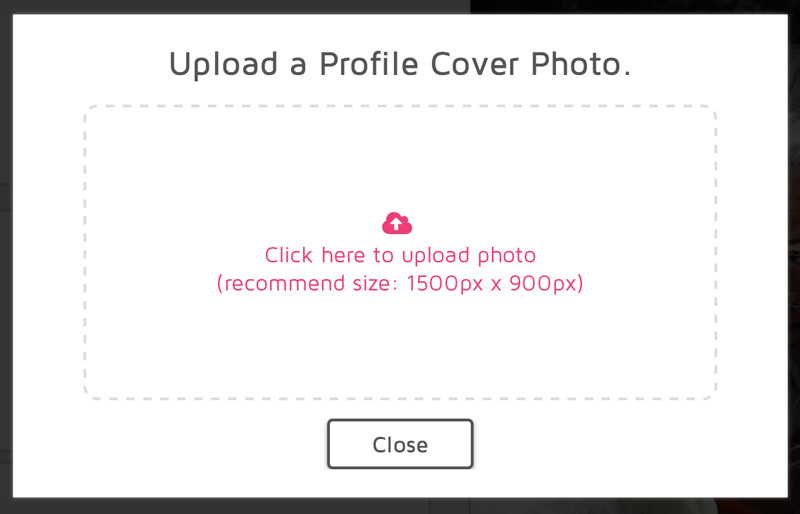
When you see a screen similar to the one above, click the upload icon and select the file you want to upload. The recommended size is an image with a minimum of 1500 by 900 pixels.
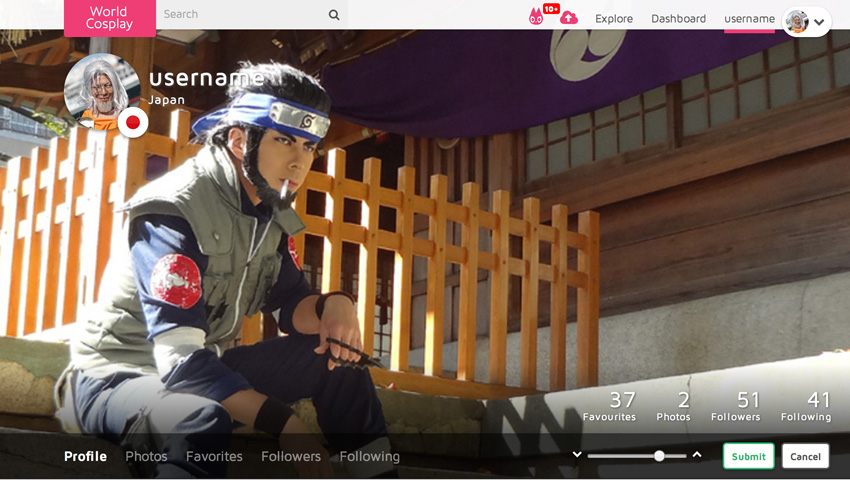
Step 3
Your photo will appear in the cover area. If your image is larger than the cover area, you can use the slider to move your cover image vertically into position.
Click the submit button when you’re finished.
プロフィール画像を変更する
Step 1
自分のプロフィールへアクセスし、プロフィールアイコンの下の「プロフィール画像を変更する」ボタンを押します。
Step 2
![]()
上記、画面が表示させるのでアップロードアイコンをクリックします。
ファイル選択画面がでるのでプロフィールに設定したい画像を選択します。
Step 3
選択した画像が表示され、点線の四角の枠で切り取りたい部分を選択します。
その後、「変更する」ボタンをクリックするとプロフィール画像が設定されます。
![]()
=========================
カバー画像を変更する
Step 1
自分のプロフィールへアクセスし、「カバー画像を変更する」ボタンを押します。
Step 2
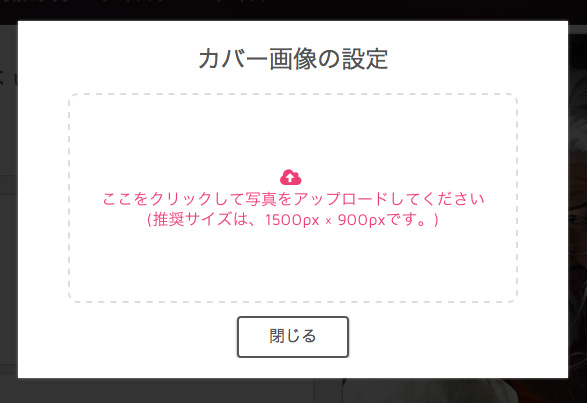
上記、画面が表示されるのでアップロードアイコンをクリックします。
ファイル選択画面がでるのでカバーに設定したい画像を選択します。
推奨サイズは、1500px ✕ 900pxです。それ以上のサイズの画像を選択してください。
Step 3
選択した画像がカバーエリアに表示されるので画像をドラックする、もしくはスライダーを動かしてカバー画像の位置を調整してください。
位置が定まったら「確定」ボタンをクリックするとカバー画像が設定されます。