How to upload photos / 作品アップロードの使い方
How to upload photos
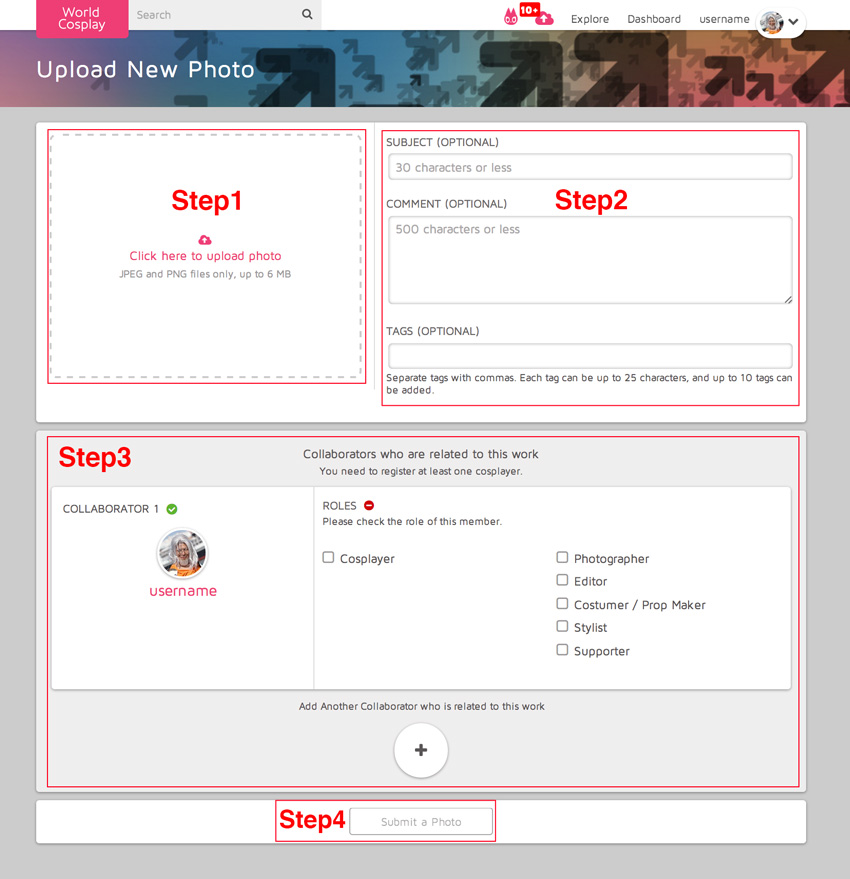
Step 1: Upload your photo.
Click or tap on the area that asks you to upload your photo. Select your the file you want to upload.
Note: Supported browsers are IE10+ and the latest versions of Firefox, Chrome, and Safari.
Step 2: Add a subject, comment and tags. (Optional)
Subject have to be within 30 characters.
Comments have to be within 500 characters.
Separate your tags by commas. You can have up to 10 tags, with each tag having up to 25 characters.
Step 3: Add related users to your photo.
You’ll need to add at least one user, the first being yourself.
If there are any other users that worked with you on creating this photo or cosplay, click “Add Another Collaborator that related to this work” to add them to the photo.

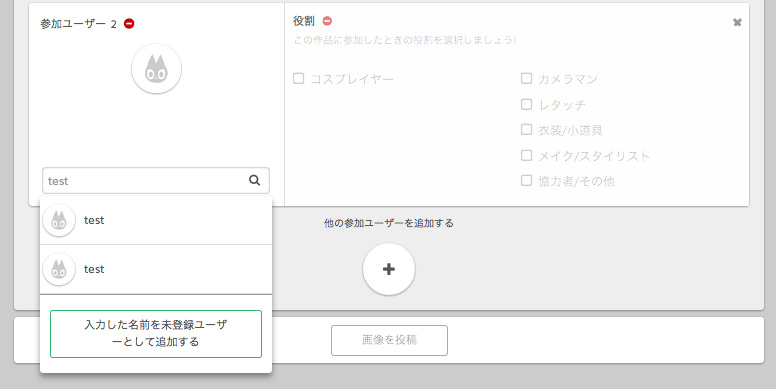
If the user you specify has an account on WorldCosplay, a list of usernames will appear when you search. Select the user you want to add and it will be marked in green. Continue adding as many users as you require for each of their roles.
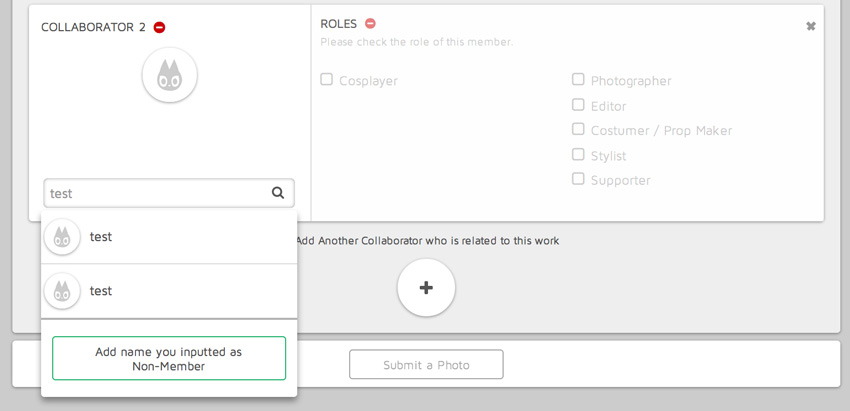
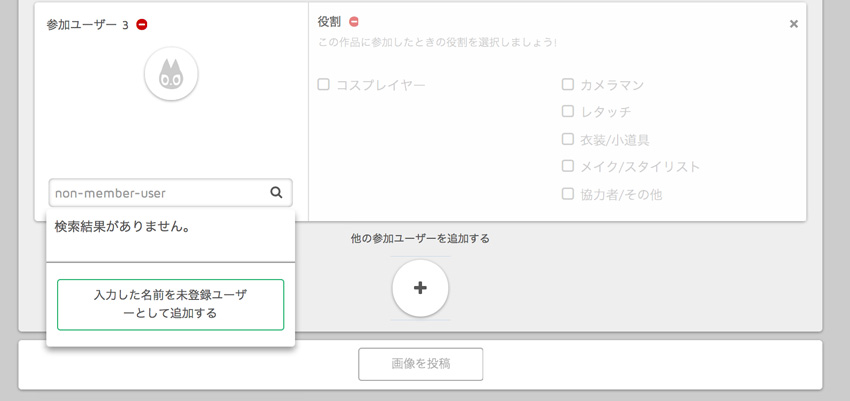
If the user you specify isn’t a WorldCosplay user, you can invite them directly to WorldCosplay after adding them.
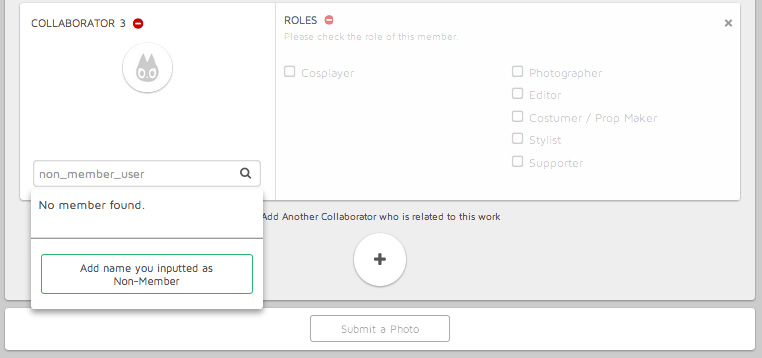
If after searching for a user you can’t find the user you’re looking for, click “Add name you inputted as Non-Member” and they will be marked in green once you’re done. Finally, add their role.
Step 4: Submit your photo to WorldCosplay.
Click or tap “Submit a photo” after it turns green to submit your photo to WorldCosplay.
Note: You must add at least one user, especially the cosplayer.
=========================
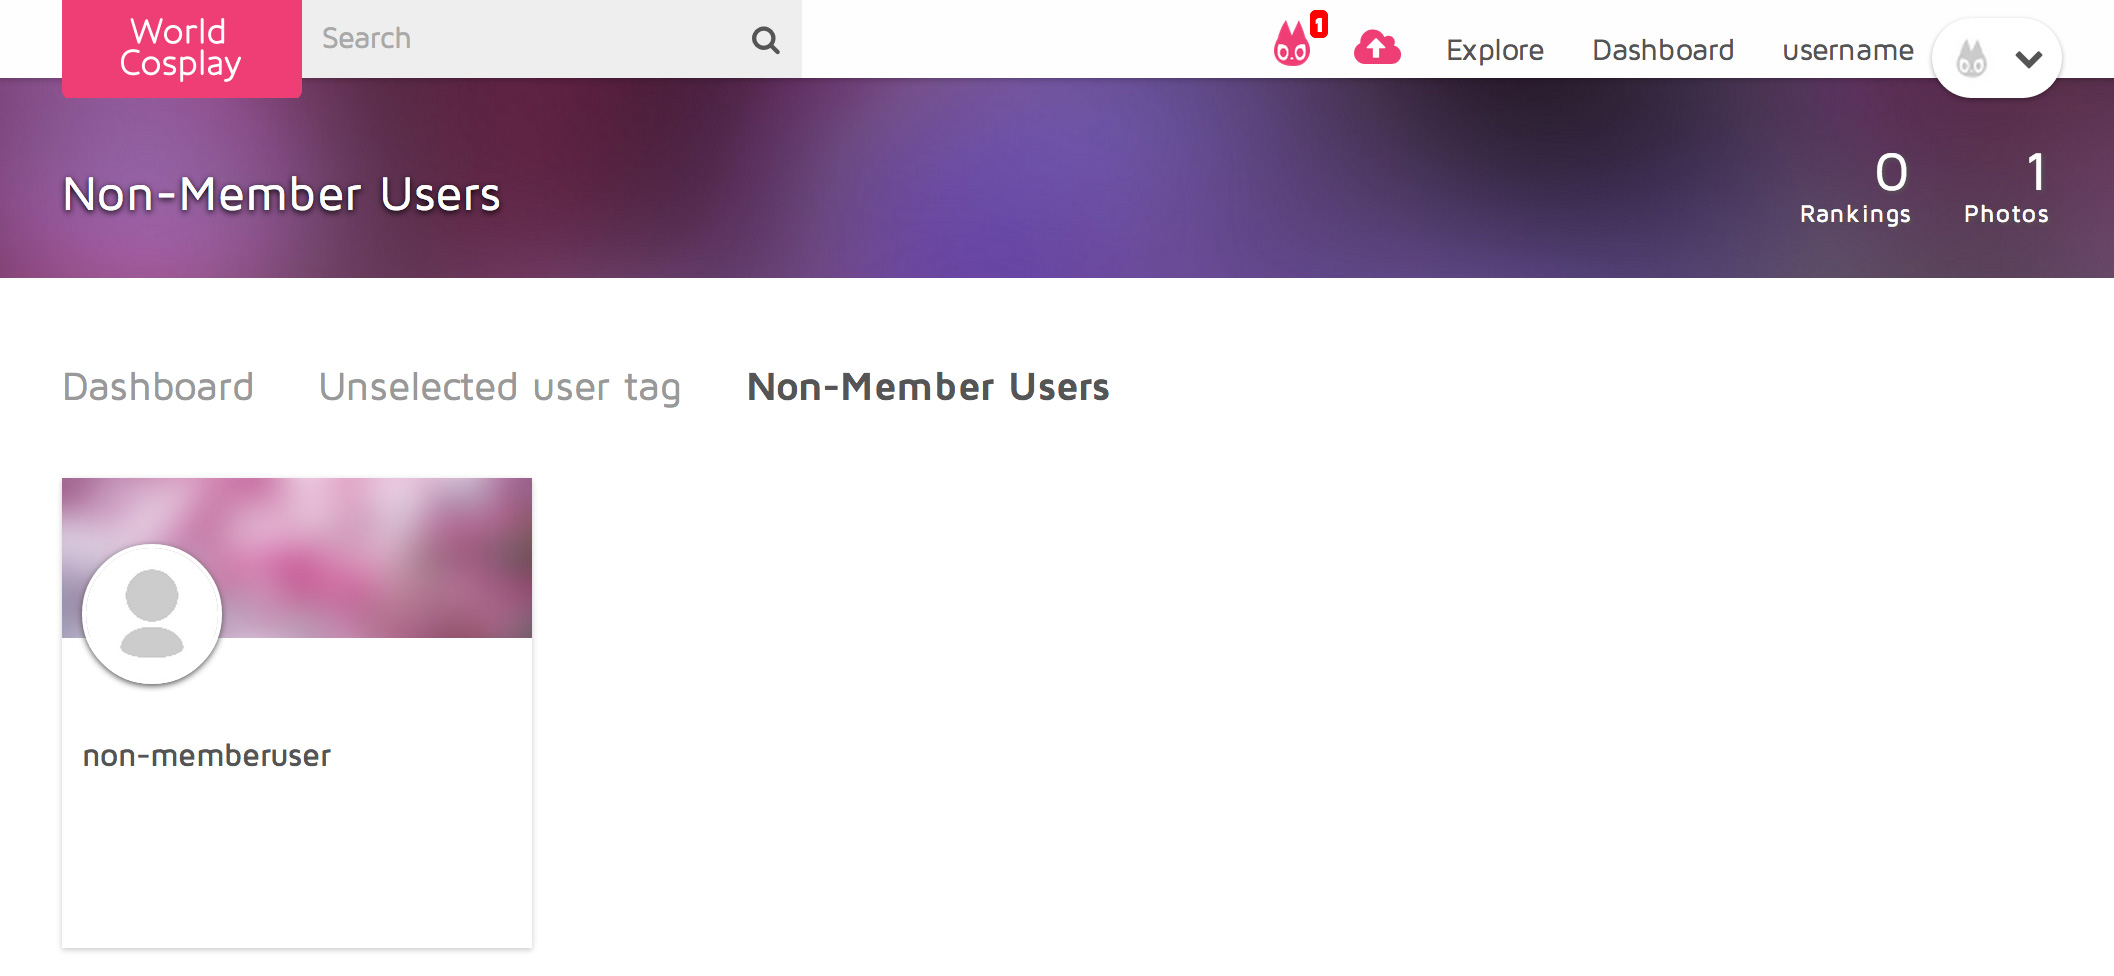
Inviting non-members to WorldCosplay
After you’ve specify a non-member to a photo, you can invite that user to join WorldCosplay or confirm their addition to your photo.
Step 1
On the dashboard page click on “Non-member Users”
Step 2
From that page, you can view a list of non-member users you’ve designated on your photos.
Step3
Click on the corresponding person you want to invite and a invite URL will appear. Send this URL to them.
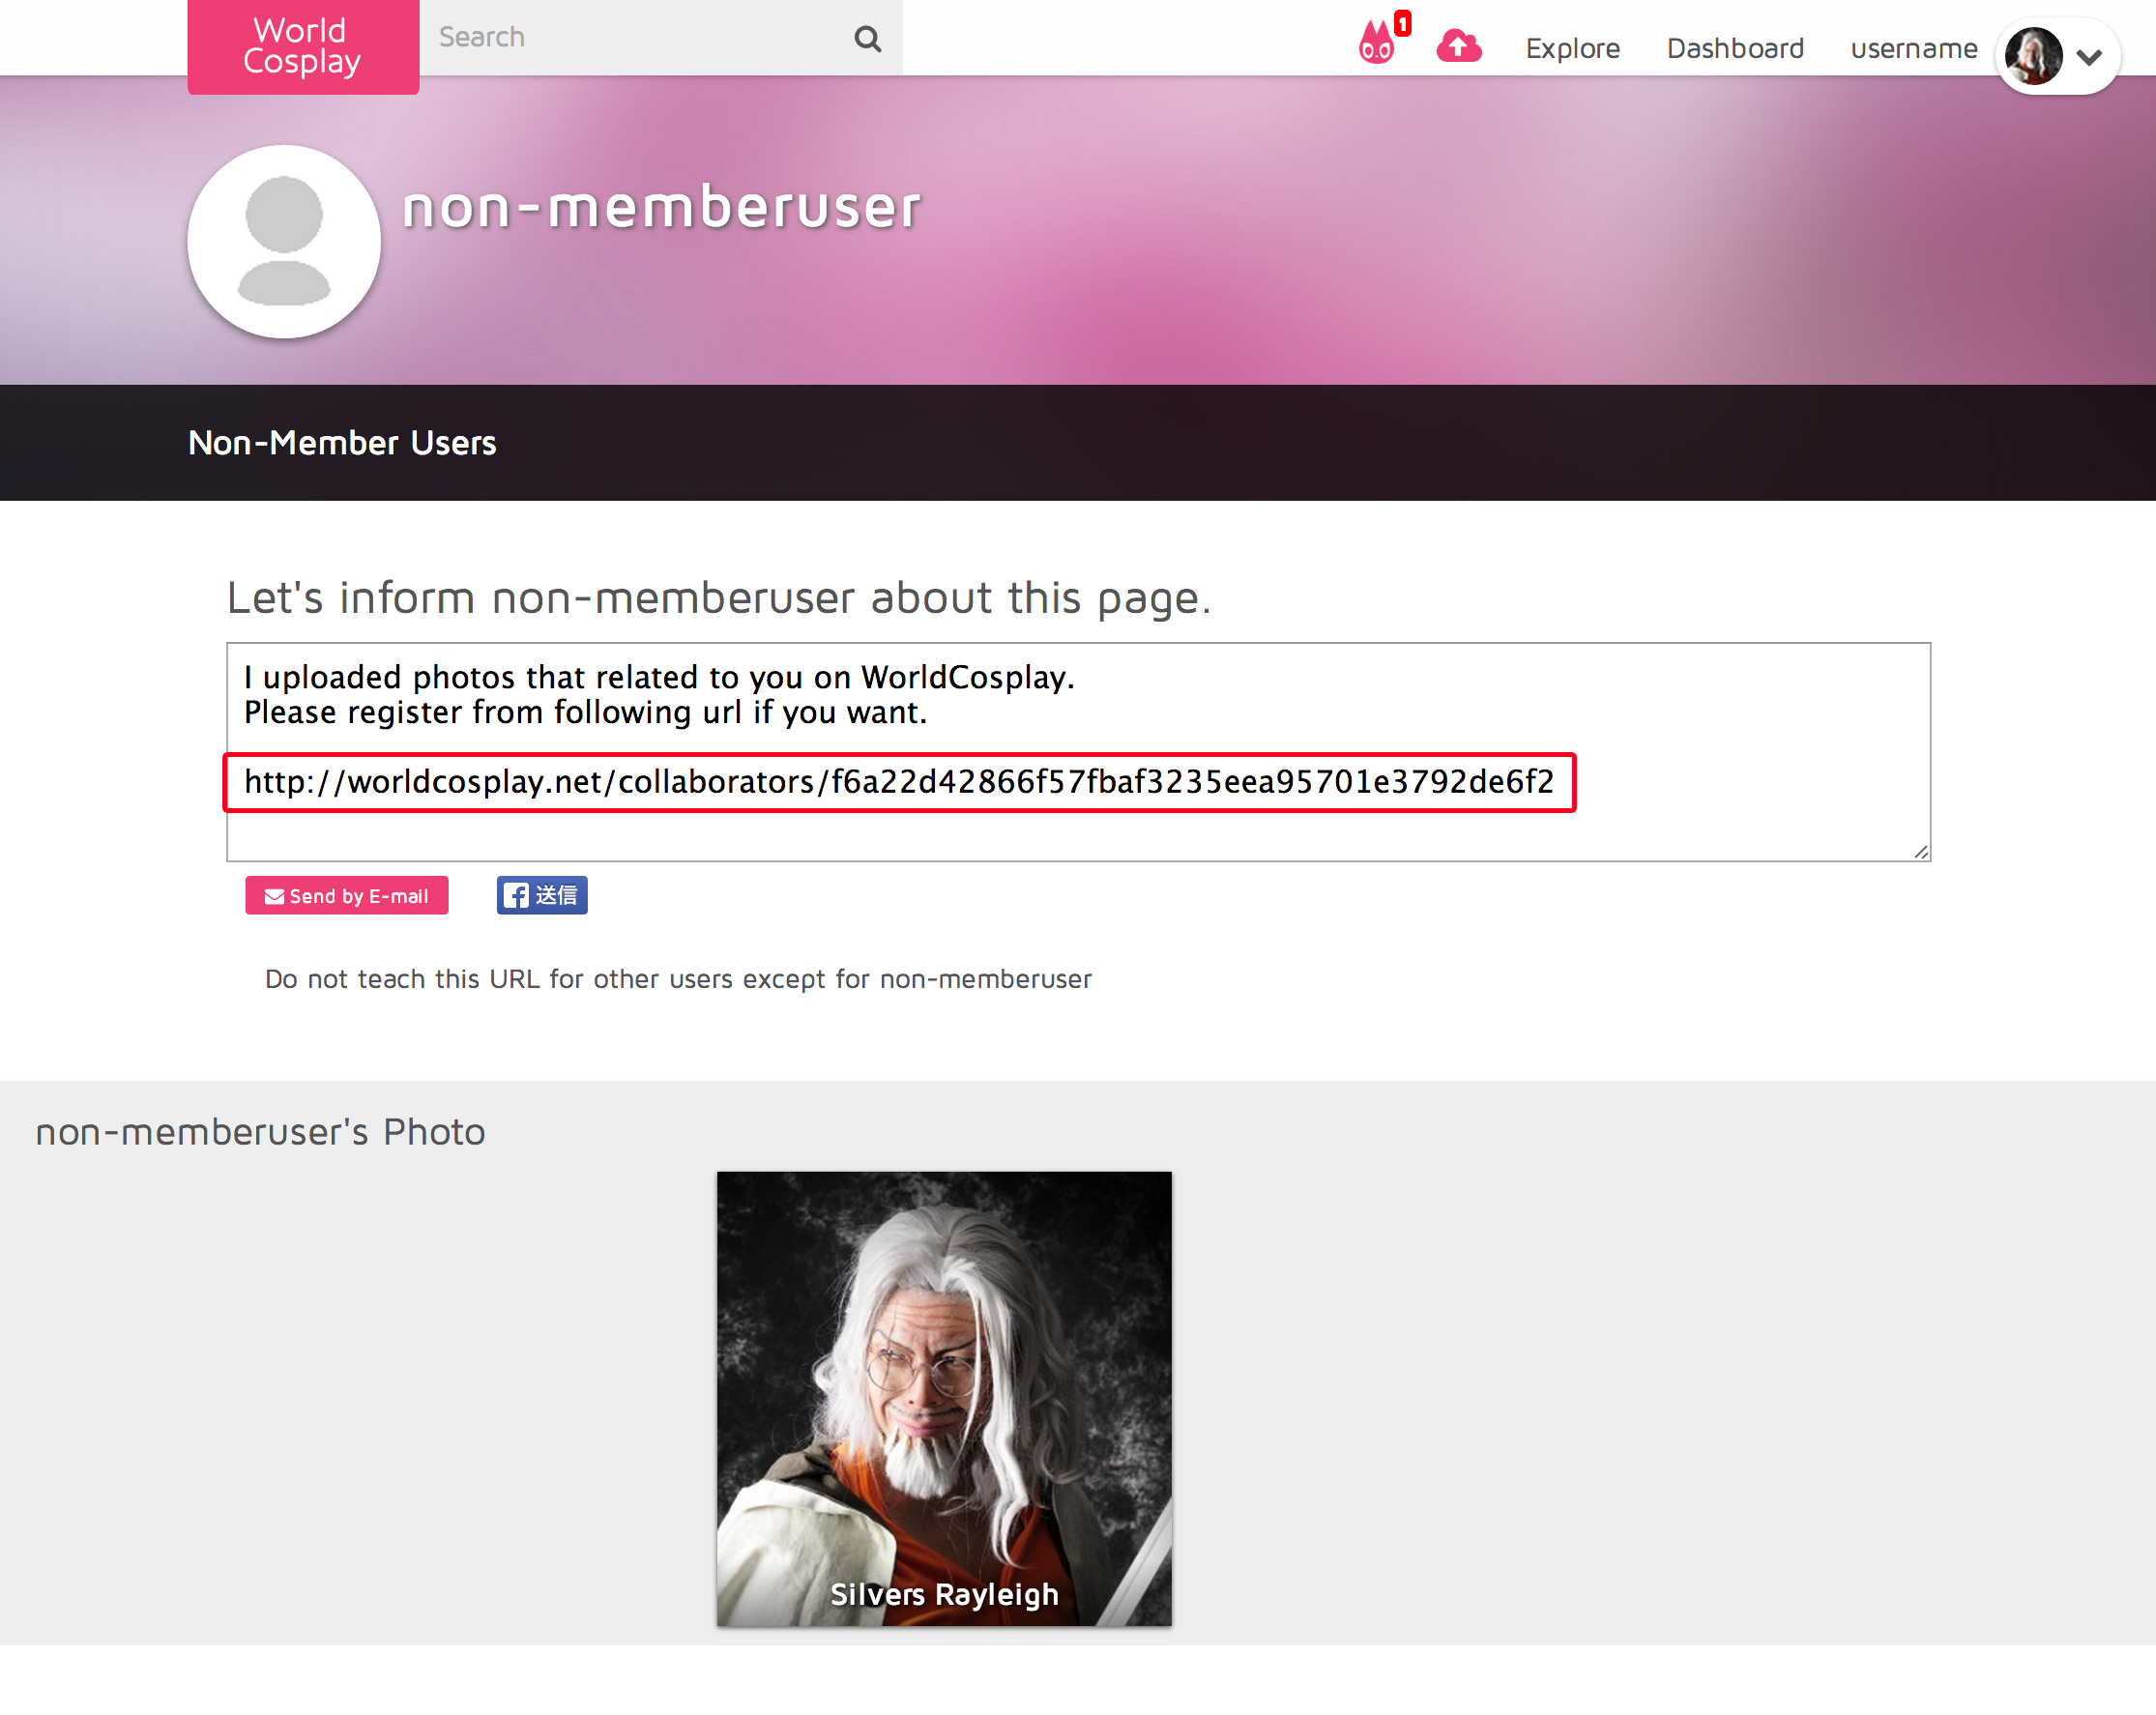
The non-member can log in using the URL and approve their name added to your work.
作品アップロードする方法
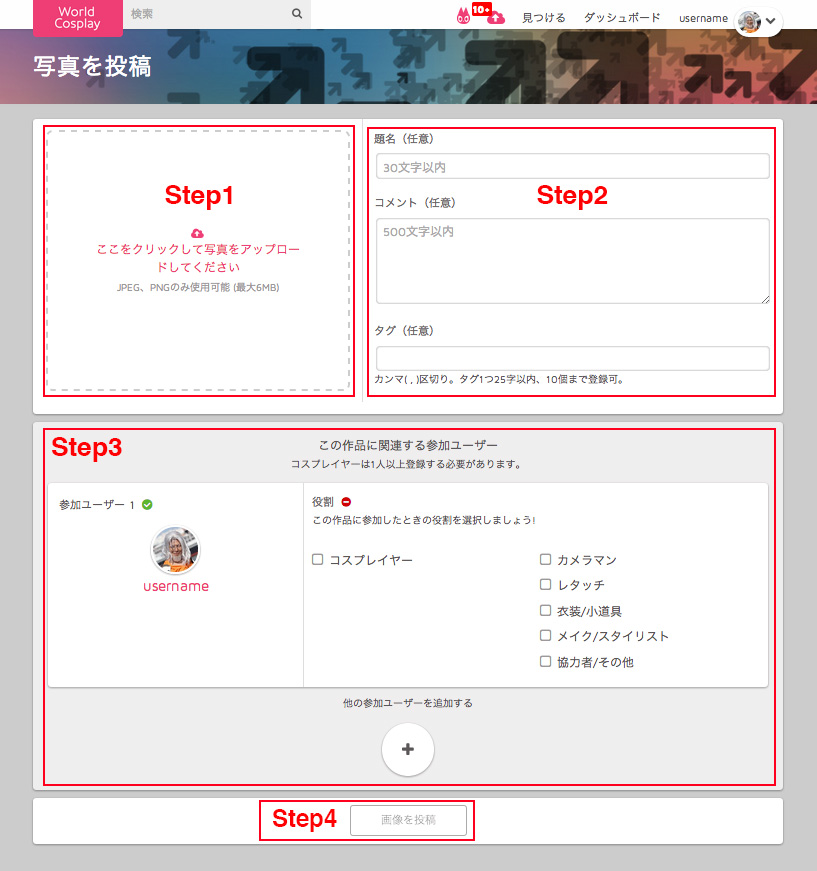
Step1 写真アップロード
「ここをクリックして写真をアップロードしてください」の枠をクリックすると
ファイル選択画面が表示されるので投稿したい作品を選択してください。
※対応ブラウザはIE10以上。Firefox、chrome、safariは最新バージョンをご利用ください。
Step2 題名、コメント、タグの入力。(任意)
題名は30文字以内。
コメントは500文字以内。
タグはカンマ( , )区切りで1つ25字以内、10個まで登録可能です。
Step3 作品に関連する参加ユーザーの登録
まずは参加ユーザー1(自分)の役割を登録します。
続いて作品に関連する参加ユーザーがいる場合は「他の参加ユーザーを追加する」ボタンを押してください。
新たに参加ユーザーの枠が追加されます。
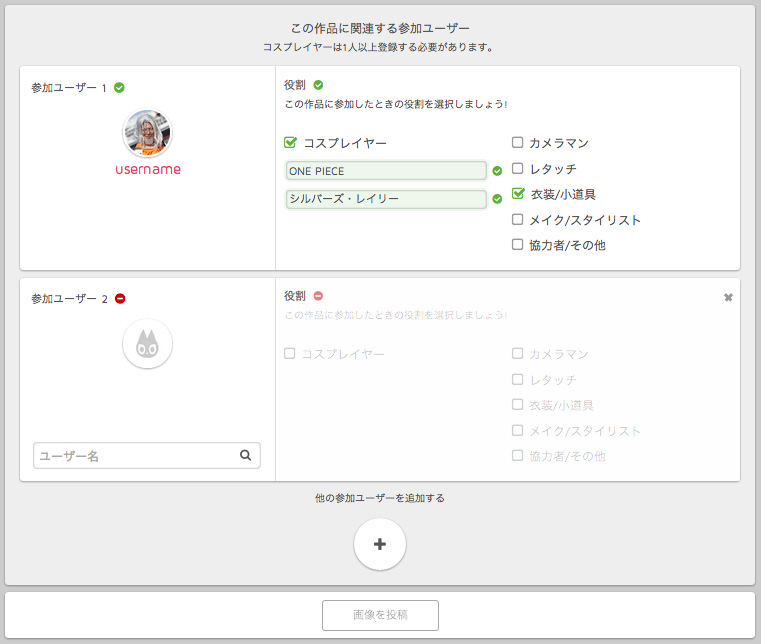
WorldCosplay会員を設定する場合は、入力欄にユーザー名を入力すると検索結果が表示されるので出てきた該当のユーザーをクリックし確定します。
確定すると緑色のマークになります。続けて追加参加ユーザーの役割を設定します。
登録したいユーザーがまだWorldCosplayにいない場合、未登録ユーザーとして登録し招待することができます。
入力欄にユーザー名を入力し検索結果に該当のユーザーがいない場合、「入力した名前を未登録ユーザーとして追加する」ボタンがあらわれるのでタップします。
入力した名前で未登録ユーザーとして登録され、緑色のマークになります。続けて役割を設定してください。
Step4 画像を投稿
ひと通り入力が終わると「画像を投稿」ボタンがアクティブ(みどり色)になるのでクリックすることで投稿できます。
※作品のアップロード完了するには作品に関連する参加ユーザーに必ず1人、コスプレイヤーを登録する必要があります。
=========================
未登録ユーザーを招待する方法
作品アップロードで未登録ユーザーを設定した方は招待し、そのユーザーに会員登録してもらうことで作品に紐付けることができます。
Step1
「ダッシュボード」ページの「未登録ユーザー」をクリックします。
Step2
「未登録ユーザー」ページでは、あなたが未登録ユーザーとして登録したユーザーの一覧が並んでいるので招待したい未登録ユーザーを選択します。

Step3
選択した未登録ユーザーのページに招待用のURLが記載されているのでそのURLを紐付けたい人にお知らせしましょう。

その後、招待した人がそのURLから会員登録(ログイン)し、紐付けを承認することで作品とユーザーが紐付きます。